Venturing into solar power for your home is a monumental step towards energy independence and a greener future. But before you envision those sleek panels glinting on your rooftop, there's crucial groundwork to cover. This isn't just about bolting panels onto your house; it's about understanding Solar Panel Compatibility & Setup Guides to ensure your system is safe, efficient, and perfectly integrated with your home's existing infrastructure. Think of this as your indispensable blueprint, guiding you from initial spark to a fully powered, sun-kissed home.
At a Glance: Your Solar Installation Journey
- Plan Meticulously: Assess energy needs, roof suitability, and electrical compatibility before you buy anything.
- Get Your Ducks in a Row: Secure permits and consider professional help for design and installation.
- Build a Solid Foundation: Correctly install your mounting system, whether on the roof or ground.
- Handle with Care: Mount your solar panels securely and ensure proper spacing and grounding.
- Wire It Right: Connect panels to the inverter, then the inverter to your home's electrical panel, always prioritizing safety and code compliance.
- Power Up Safely: Commission your system, register for net metering, and set up ongoing monitoring.
The Indispensable First Step: Pre-Installation Planning & Compatibility Assessment
Think of installing solar panels like building an addition to your home. You wouldn't just start hammering away; you'd plan, assess the existing structure, and ensure everything fits together seamlessly. The same goes for solar. Skipping these initial assessments can lead to costly mistakes, inefficiencies, or even safety hazards.
Pinpointing Your Energy Needs: How Much Solar Do You Really Need?
The first question isn't "how many panels?" but "how much energy do I use?" You want a system sized to meet your actual consumption, not just an arbitrary number.
- Dive into Your Electricity Bills: Gather your last 12 months of utility bills. This treasure trove of data will reveal your average monthly and daily (kWh) consumption patterns. Look for peaks and troughs throughout the year.
- Calculate Your Daily Usage: Divide your total annual kWh by 365 to get an average daily usage. This figure is your target.
- Audit Your Appliances: Make a list of all major appliances. Note their wattage (Wh or kWh) and how long you typically use them each day. This granular detail helps confirm the larger bill trends and identify energy hogs. For example, if you're running a powerful server rack, that's a different load profile than a standard household.
Your Roof's Report Card: Site & Structural Assessment
Your roof isn't just a surface; it's the foundation for your solar array. Its condition, orientation, and available space directly impact your system's performance and longevity.
- Roof Condition & Age: If your roof needs replacing in the next 5-10 years, do it before installing solar. Removing and reinstalling panels later can add thousands of dollars to your costs.
- Structural Integrity: Solar panels add weight (typically 2-4 pounds per square foot). A qualified professional will assess if your roof structure can support this additional load without modification.
- Optimal Orientation & Pitch: In the Northern Hemisphere, south-facing roofs receive the most direct sunlight throughout the day, maximizing energy production. East and west-facing roofs can still work but might yield 15-20% less energy. Avoid north-facing installations entirely. The optimal pitch (tilt angle) for panels usually matches your geographic latitude for year-round efficiency, with 15-40 degrees generally performing well.
- Available Space: Each kilowatt (kW) of solar capacity requires roughly 100 square feet of unobstructed roof space. So, a common 5kW residential system needs about 500 square feet.
- Shade Mitigation: Trees, chimneys, adjacent buildings – anything that casts a shadow on your panels throughout the day will reduce their output. Identify these shading issues and address them, either through pruning or strategic panel placement.
Understanding Your Electrical System: The Heart of Compatibility
This is arguably the most critical compatibility check. Your solar system needs to seamlessly integrate with your home's existing electrical grid.
- Current Setup Assessment: What kind of electrical wiring do you have? What's the capacity of your existing circuits? A licensed electrician or engineer is indispensable here. They'll evaluate the condition, capacity, and potential need for modifications, such as upgrading an undersized circuit.
- Your Electrical Panel (Breaker Box):
- Amperage and Voltage: Your proposed solar system's output must match the capabilities of your current electrical panel.
- Panel Type: Older electrical panels might not be designed to handle the increased electrical load and back-feed from a solar system. An upgrade to a newer, larger capacity panel might be a necessary, albeit often overlooked, expense.
- Space for Equipment: Is there enough physical space in your panel for new breakers dedicated to the solar system and other necessary equipment like disconnects or monitoring devices?
- Wiring Evaluation:
- Proper Grounding: This is non-negotiable for safety. All electrical components must be properly grounded to the earth (e.g., a 6-foot grounding rod, appropriately sized copper wire) to prevent shocks, fires, and protect against lightning strikes.
- Cable Condition: Check for any signs of overheating or damage to existing wiring. Ensure adequate ventilation around the panel to prevent heat buildup.
- Voltage and Amperage Compatibility: All new wiring must be compatible with the solar system's voltage and amperage requirements, meeting local electrical codes.
Choosing Your Solar System: Panels, Inverters, and Your Budget
With your energy needs and site assessment complete, you can start selecting components.
- Solar Panel Types:
- Monocrystalline: High efficiency, sleek black appearance, but typically more expensive.
- Polycrystalline: Slightly less efficient than monocrystalline, but more affordable and recognizable by their blue hue.
- Thin-film: Lightweight, flexible, and good in low light, but generally the least efficient for residential use.
Compare their efficiency ratings and upfront costs to find the best fit for your budget and space constraints. - Inverters: This is the brain of your system, converting the DC electricity from panels into usable AC power for your home. Options include string inverters (cost-effective for simple arrays), micro-inverters (panel-level optimization, better for shaded areas), and power optimizers (a hybrid approach).
- Budget Considerations: Solar is an investment. Factor in equipment, installation, and any potential electrical upgrades. Look into government incentives, such as tax credits or rebates, which can significantly reduce your overall cost. Always prioritize high-quality panels with robust warranties and a proven lifespan. For those looking for robust backup or off-grid capabilities, exploring options like Patriot Solar Generators can provide additional peace of mind and flexibility.
Permits & Professional Expertise: Don't Go It Alone
Solar installation involves complex electrical work, structural modifications, and navigating local regulations.
- Obtain Necessary Permits: This is paramount. You'll need permits from your local authority (building, electrical, zoning) and often approval from your utility company. Requirements vary widely by location, so contact your local permitting office early.
- Hire Professional Installers: While DIY solar is technically possible for the highly skilled, it's strongly recommended to hire licensed professionals. They possess the expertise to accurately assess energy needs, size the system, ensure proper installation, navigate complex permitting processes, and guarantee your system meets all safety codes. This minimizes hazards, ensures optimal system performance, and often validates warranties.
Building the Backbone: Mounting System Installation
Once your plans are approved and components selected, the physical work begins with the mounting system. This provides the secure framework for your panels.
Choosing Your Mount: Roof or Ground?
- Roof-Mounted Systems: The most common choice for residential properties. They're generally more cost-effective, utilize existing roof space, and benefit from height to avoid ground-level shading.
- Ground-Mounted Systems: Ideal if you have ample land, significant shading on your roof, or if your roof can't support the weight. They offer more flexibility in tilt and orientation and are easier to access for cleaning, but require more land and often more extensive trenching for wiring.
Roof-Mounted Installation: The Standard Approach
This process focuses on securing rails to your roof that will hold the panels.
- Locate Rafters: Using a stud finder, pinpoint your roof rafters. This is where the mounting hardware will attach, not just to the roof decking.
- Install Flashing & Standoffs: Flashing is crucial to prevent water leaks. It's installed under shingles and around the base of the "standoffs," which are then bolted directly into the rafters using lag bolts and washers. These standoffs elevate the rails slightly above the roof surface.
- Attach Mounting Rails: Install the mounting rails horizontally across the standoffs. These rails must be perfectly level and spaced precisely according to your panel dimensions (e.g., for common 65x39 inch panels). Accuracy here is key for a uniform array.
Ground-Mounted Installation: A Sturdier Alternative
For ground mounts, you're creating a new, dedicated structure.
- Dig Foundation Holes: Excavate holes 3-4 feet deep, ensuring they go below your local frost line to prevent shifting due due to freezing and thawing.
- Pour Concrete Foundations: Pour concrete into these holes and embed your mounting posts. These posts will support the entire array. Allow the concrete at least 48 hours to cure completely before proceeding.
- Attach Structure: Once cured, the remaining mounting structure and rails are attached to these posts.
Bringing the Sun Home: Solar Panel Installation
With the mounting system securely in place, it's time to install the panels themselves.
- Handle with Extreme Care: Solar panels are both fragile and expensive. Always work with a partner, and use appropriate safety gear like safety harnesses, ropes, and non-slip footwear, especially when working on a roof.
- Mounting the Panels: Carefully lift each panel and secure it to the mounting rails using specialized clamps. Typically, you'll start from the bottom row and work your way up.
- Mind the Gap: Leave a small gap (0.5-1 inch is usually recommended) between panels. This allows for thermal expansion and contraction, preventing stress that could damage the panels over time.
- Secure & Torque: Use middle clamps to secure panels to each other along the rails, and end clamps for the panels at the very edge of the array. Tighten all clamps to the manufacturer's specified torque settings using a torque wrench. Over-tightening can damage the panel frame, while under-tightening can lead to loose panels.
- Grounding the System: Crucial for safety, the entire mounting system and the frames of all panels must be properly grounded according to electrical codes. This involves using approved copper grounding wire and grounding lugs.
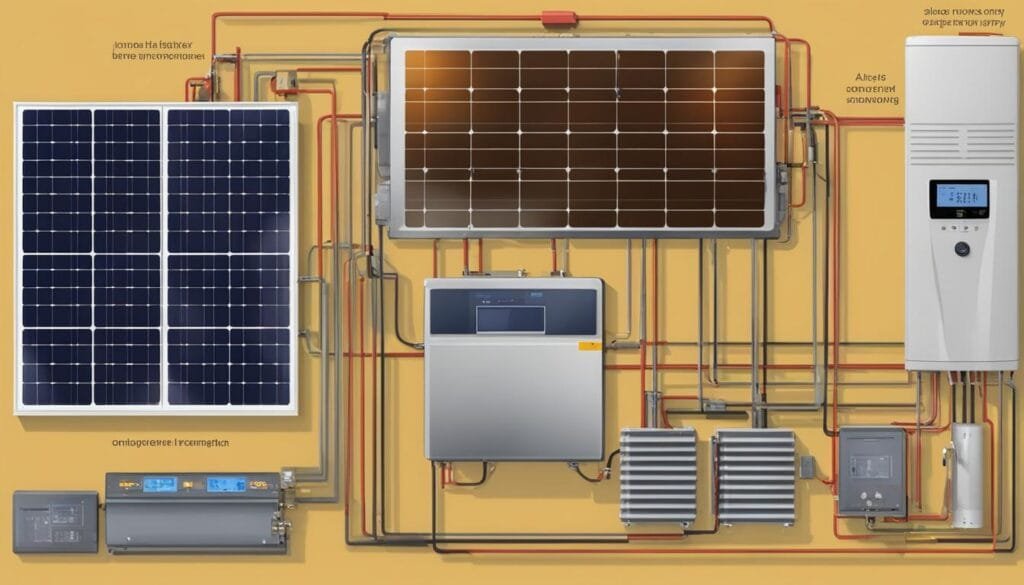
Connecting the Dots: Wiring & Inverter Setup
This is where the direct current (DC) power from the panels is converted and integrated into your home's alternating current (AC) system. This phase requires meticulous attention to detail and, often, a licensed electrician.
DC Wiring: From Panels to Inverter
- Series Connections (Strings): Panels are typically wired in series to form "strings." Connecting panels in series increases the voltage, which is necessary for the inverter to operate efficiently. You'll need to calculate the maximum string voltage based on the coldest expected temperatures to ensure it doesn't exceed your inverter's input limits.
- MC4 Connectors: Use specialized MC4 connectors for all DC connections. These are weatherproof, lock securely, and are designed for solar. Never splice or tape DC wiring; it's a major safety and performance hazard.
- Cable Routing: Route all DC cables through appropriate electrical conduit for physical protection from the elements, pests, and UV degradation.
- System Design: Your system will likely have multiple strings, perhaps 2-3 strings of 8-12 panels each, depending on your system size and inverter specifications. Always consult your inverter's manual for maximum string length and voltage limits.
Disconnect Switches: Your System's Emergency Stop
Safety is paramount.
- DC Disconnect: Install a DC disconnect switch between the solar array and the inverter. This allows you to safely shut off the power from the panels for maintenance or emergencies.
- AC Disconnect: Most electrical codes require both DC and AC disconnects. The AC disconnect is typically placed between the inverter's output and your electrical panel.
Inverter Placement: The Brain's Home
Your inverter needs a protected, well-ventilated location to function optimally and prolong its lifespan.
- Ideal Spots: A garage wall, a utility room, or a shaded exterior wall are common choices.
- Avoid: Direct sunlight (which causes overheating), attics (prone to extreme temperatures), or small, enclosed spaces with poor airflow.
Connecting the Inverter: DC Input & AC Output
This is the central nervous system of your solar power system.
- DC Input Connection: Connect the DC input cables from your solar panel strings to the DC terminals on the inverter. Crucially, before making these connections, verify the polarity of each string with a multimeter. Reversing polarity can severely damage your inverter.
- AC Output Connection: The inverter's AC output needs to connect to your home's main electrical panel. This connection typically requires a licensed electrician. They will install a dedicated circuit breaker for your solar system, appropriately sized for the inverter's maximum AC output current, within your main electrical panel. This allows your solar-generated power to flow into your home and, if you're net-metered, back to the grid.
- Configuration & Monitoring: Once wired, configure the inverter settings for your specific grid parameters (voltage limits, frequency range) and ensure anti-islanding protection is active (a safety feature that shuts down the inverter if the grid goes down). Most modern inverters offer WiFi connectivity for real-time monitoring of your system's performance via an app.
The Grand Finale: System Commissioning & Ongoing Monitoring
You're almost there! Once everything is installed, it's time to safely bring your system online and set yourself up for long-term success.
Pre-Energization Inspection: The Final Check
Before flipping any switches, perform a thorough inspection:
- Electrical Connections: Double-check all electrical connections for tightness and proper insulation.
- Grounding Verification: Confirm that all components, including panel frames and mounting structures, are properly grounded.
- Mounting Hardware: Ensure all mounting hardware is secure and panels are firmly clamped.
- Voltage Readings: Use a multimeter to measure the open-circuit voltage of each solar string. Compare these readings to your calculated values to ensure consistency and identify any wiring issues.
The Moment of Truth: System Startup
Follow a deliberate, gradual startup sequence to ensure safety and proper operation:
- Close DC Disconnect: First, close the DC disconnect switch, allowing power from the panels to flow to the inverter. Observe the inverter display to confirm it recognizes the DC input.
- Close AC Disconnect: Next, close the AC disconnect switch and the dedicated solar breaker in your main electrical panel. This connects the inverter's output to your home's grid.
- Monitor Inverter: Carefully monitor the inverter's display for any error messages or unusual behavior. It should typically go through a self-test sequence before starting to produce power.
Performance Testing: How's It Doing?
On a bright, clear day, your system's production should ideally reach 80-90% of its rated capacity under optimal conditions. Compare the real-time output displayed on your inverter or monitoring app with theoretical production estimates.
Net Metering & Registration: Getting Credit for Your Sun Power
This is where your utility company comes in.
- Register Your System: You'll need to officially register your new solar system with your utility provider.
- Apply for Net Metering: Net metering allows you to send excess electricity generated by your panels back to the grid, earning credits on your electricity bill. This often involves applying for a specific net metering agreement.
- Final Inspection: Your utility company or local electrical inspector will likely conduct a final inspection to ensure compliance with all codes before allowing full grid interconnection.
Ongoing Monitoring & Maintenance: Keeping Your System Optimal
Your solar journey doesn't end after commissioning. Regular care ensures maximum output and longevity.
- Clean Panels Regularly: Dust, pollen, bird droppings, and leaves can reduce efficiency. Clean the panel surfaces periodically with water and a soft brush, especially after long dry spells.
- Inspect for Damage: Routinely check for any physical damage, loose wiring, or signs of wear and tear on panels, wiring, and mounting hardware. Address any issues promptly.
- Monitor Energy Production: Utilize your inverter's monitoring system or a third-party app. Real-time monitoring provides valuable data on your energy generation, helps identify any dips in performance that might signal a problem (like shading or a faulty component), and offers insights into your consumption patterns.
- Component Replacement: Be prepared to replace worn or damaged components as needed. While panels have long warranties (25+ years), inverters typically have shorter lifespans (10-15 years) and may need replacement sooner.
Your Home, Powered by the Sun
Installing a solar panel system is a significant undertaking, but with careful planning, attention to detail, and a clear understanding of Solar Panel Compatibility & Setup Guides, it's an incredibly rewarding one. By taking a methodical approach to assessing your energy needs, verifying electrical system compatibility, choosing the right components, and ensuring professional installation and ongoing care, you'll build a robust, efficient, and long-lasting solar array that powers your home for decades to come. Welcome to the future of energy.